Imagine walking out of the house with flawless, salon-worthy nails without spending hours at a nail bar or breaking the bank on professional services. For millions of nail enthusiasts, that dream is now an everyday reality. Press-on nails have surged back into the spotlight, evolving far beyond the flimsy plastic sets of the past into sophisticated, beautifully crafted alternatives that rival professional manicures in both appearance and durability.
But the burning question remains: are press-on nails truly easy to use, or do they require the steady hands of a seasoned nail technician? Whether you’re a seasoned nail art lover or someone just beginning to explore creative self-expression through manicures, this article breaks down everything you need to know. From understanding what modern press-on nails actually are, to mastering a foolproof application process, exploring versatile styles like short almond nails, and discovering how specialized adhesives like jelly glue can transform your wear time — consider this your complete guide to effortless, stunning nails at home.
What Are Press-On Nails? A Comprehensive Overview
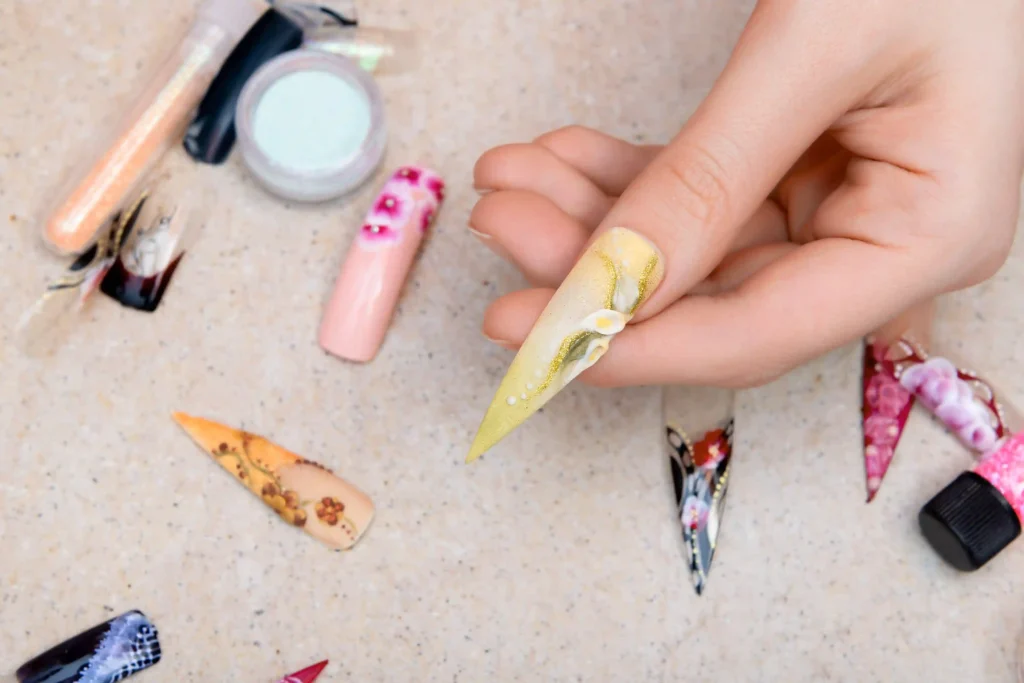
Press-on nails are pre-shaped, pre-designed nail enhancements that adhere directly to your natural nails using adhesive tabs or nail glue. Unlike traditional acrylic or gel extensions that require professional application and UV lamps, press-ons offer an instant transformation you can achieve entirely at home. Originally introduced in the 1970s as a novelty beauty product, they were largely dismissed as cheap, temporary fixes — prone to popping off at the worst possible moments and offering limited style options.
Today’s nails press ons are an entirely different story. Modern sets are crafted from high-quality ABS plastic, soft gel, or even real gel materials that mimic the look and feel of professional salon nails with impressive accuracy. They come in an extraordinary range of shapes — square, oval, coffin, stiletto, and almond — and lengths from ultra-short to dramatically long. Finishes span from glossy and matte to chrome, glitter, and intricate hand-painted nail art that would take a professional technician considerable time to recreate.
Their surging popularity among nail enthusiasts is no accident. Social media communities have embraced press-ons as a legitimate form of nail artistry, with creators sharing custom designs and application tutorials daily. Brands like Never Have I Ever have tapped into this creative energy, offering distinctive press-on designs that reflect the same bold, expressive spirit driving the nail art community forward. For enthusiasts who love rotating styles frequently, press-ons eliminate the damage cycle associated with repeated gel or acrylic removal. They’re also inclusive — accessible to people with varying budgets, skill levels, and lifestyles who still want beautiful, expressive nails without the commitment of a salon appointment.
The Ease of Use: Why Press-On Nails Appeal to Nail Enthusiasts
One of the most compelling reasons nail enthusiasts gravitate toward press-on nails is sheer convenience. A full set can be applied in under 30 minutes — compare that to a salon visit that typically consumes two to three hours once you factor in travel, waiting, application, and drying time. For anyone juggling a busy schedule, that time difference is significant. Press-ons are genuinely easy to use, requiring no professional training, no UV lamp, and no specialized tools beyond a nail file and your chosen adhesive.
The cost advantage is equally hard to ignore. Professional gel or acrylic manicures can run anywhere from $40 to well over $100 per session, with removal fees often added on top. A quality press-on set delivers a comparable aesthetic result at a fraction of that investment, and many sets are reusable if removed carefully. For enthusiasts who love switching up their look weekly, this makes creative experimentation genuinely sustainable rather than financially draining.
What truly sets press-ons apart from traditional manicures, though, is the DIY-friendly experience they offer. There’s no waiting for polish to dry, no risk of smudging, and no chemical fumes to endure. Unlike acrylic applications that require precise mixing ratios and professional-grade tools, press-ons are designed so that anyone — regardless of experience level — can achieve polished, professional-looking results at home. The learning curve is minimal: once you’ve done it once or twice, the process becomes second nature. For nail enthusiasts who treat their manicure as a form of personal expression, that accessibility is everything.
Step-by-Step Guide to Applying Press-On Nails for Perfect Results
Achieving a flawless press-on manicure isn’t complicated, but following the right sequence makes a noticeable difference in how long your nails stay put and how polished they look. The entire process breaks down into three essential phases: preparation, application, and finishing — each one building on the last to give you results that genuinely rival a salon visit.
Preparing Your Natural Nails
Preparation is the foundation of any long-lasting press-on application. Start by removing any existing polish with a non-acetone remover, then wash your hands thoroughly. Push back your cuticles gently using a cuticle pusher — this creates a cleaner nail bed surface and prevents lifting at the base. File your natural nails to a short, even length, then buff the surface lightly to remove shine. Finish by wiping each nail with a cotton pad soaked in isopropyl alcohol. This removes oils and residue that would otherwise prevent the adhesive from bonding properly, so don’t skip this step.
Applying the Press-On Nails
Before applying anything, lay out your press-on set and match each nail to the correct finger by size. A proper fit should cover your nail bed edge to edge without overlapping your skin. Apply your chosen adhesive — either a glue drop or adhesive tab — to your natural nail rather than the press-on itself for better control. Position the press-on at a slight angle starting from the cuticle line, then press down firmly and hold for 10 to 15 seconds. Work from your pinky finger toward your thumb on each hand to maintain stability throughout.
Sealing and Finishing Touches
Once all nails are applied, run a file along the free edge of each one to smooth any uneven tips and refine the shape to your preference. Apply a thin layer of clear top coat over each nail, paying special attention to the edges where lifting typically begins — this seals the press-on and significantly extends wear time. Avoid soaking your hands in water for at least one hour after application to let the adhesive cure fully. Going forward, wearing gloves during dishwashing and applying cuticle oil daily around the nail edges will keep your set looking fresh and intact for up to two weeks.
Versatile Styles: From Short Almond Nails to Endless Possibilities
One of the most exciting aspects of press-on nails is the sheer breadth of styles available — a range so expansive that even the most dedicated nail enthusiast is unlikely to exhaust the options. Whether your aesthetic leans toward understated elegance or bold, maximalist nail art, there’s a press-on set designed with you in mind. Shape alone offers tremendous variety: square, coffin, stiletto, oval, and the perennially popular almond all have dedicated followings, each flattering different hand shapes and personal styles in distinct ways.
Short almond nails deserve particular attention for anyone new to press-ons or seeking an everyday wearable option. The almond shape — tapered sides meeting a rounded tip — creates an elegant, elongating effect that works beautifully on shorter lengths. Unlike dramatic stiletto or extra-long coffin nails, short almond nails are practical enough for daily tasks like typing and cooking while still looking polished and intentional. They’ve become a go-to choice for nail enthusiasts who want a refined, versatile look that transitions seamlessly from the office to a night out.
Beyond shape, the design possibilities are genuinely limitless. Nude and neutral tones suit minimalist preferences, while seasonal collections bring festive patterns, florals, and abstract art into the mix. Chrome finishes, velvet textures, rhinestone embellishments, and hand-painted designs — including edgy, tattoo-inspired motifs of the kind Never Have I Ever has become known for — offer the sort of intricate detail that would otherwise require a skilled nail technician and considerable chair time. For enthusiasts who love rotating their style with the seasons, trends, or even their outfit, press-ons make that creative freedom completely achievable without any long-term commitment.
Enhancing Adhesion: The Role of Jelly Glue in Press-On Nails
Not all adhesives are created equal, and the type you choose has a direct impact on how long your press-ons stay intact. Jelly glue has emerged as a standout option among nail enthusiasts, and for good reason. Unlike traditional nail glue, which sets rigidly and can cause damage during removal, jelly glue has a flexible, gel-like consistency that bonds securely while remaining gentle on your natural nails. Its slightly cushioned texture also helps accommodate minor size discrepancies between the press-on and your nail bed, creating a more seamless, natural-looking fit.
For application, dispense a small pea-sized amount of jelly glue onto your natural nail and spread it evenly toward the edges before pressing the nail down. Avoid applying too much — excess glue squeezing out around the sides can weaken the bond and create a messy finish. Jelly glue is particularly well-suited for enthusiasts who wear press-ons frequently, since its flexible hold makes removal significantly easier and less traumatic to the nail plate. For those prioritizing reusability, it’s the clear adhesive choice.
Press-On Nails: A Smart Choice for Every Nail Enthusiast
Press-on nails have genuinely earned their place as a legitimate, practical choice for nail enthusiasts at every experience level. As this guide has shown, they’re not just easy to use — they’re designed to make beautiful nails accessible to everyone. From understanding the quality and variety of modern sets, to following a straightforward preparation and application process, to exploring versatile styles like short almond nails and choosing the right adhesive like jelly glue for extended wear, every aspect of the press-on experience is built around simplicity and results.
The days of press-ons being considered a lesser alternative are firmly behind us. Today, they represent a smart, creative, and genuinely enjoyable way to express your personal style without the time commitment, expense, or damage associated with traditional salon services. Whether you’re experimenting with nail art for the first time or you’re a seasoned enthusiast looking for a more flexible routine, press-on nails deliver on every front.
So if you’ve been hesitating, consider this your sign to give them a try. Pick a shape that excites you, follow the steps, and see for yourself how effortlessly stunning your nails can look — no salon required.

